
Ever stood atop a mist-cloaked ridge at dawn, heart pounding from the climb and awe, only to find your photos look like… well, a gray smudge with pixelated trees? You’re not alone. 73% of outdoor photographers admit their gear fails them on-trail—especially when trying to capture the raw drama of alpine light or the delicate veins of a dewy fern (Nature Photographers Network, 2023).
If you’re serious about hiking photography—not just snapping blurry selfies with mountain backdrops—you need more than a smartphone. You need a digital nature lens: purpose-built optics that marry rugged durability with optical precision for wild environments.
In this guide, you’ll discover:
- Why “just any camera” won’t cut it in the backcountry
- How to choose the right digital nature lens for your hiking style
- Real-world mistakes I’ve made (and how you can avoid them)
- Top-performing lenses trusted by National Geographic field shooters
Table of Contents
- Why Do So Many Hiking Photos Fall Flat?
- How to Choose Your Perfect Digital Nature Lens
- 5 Pro Tips for Shooting Sharp, Emotional Nature Shots
- Case Studies: From Blurry Ferns to Award-Winning Shots
- FAQs About Digital Nature Lenses
Key Takeaways
- A digital nature lens isn’t just a zoom—it’s engineered for weather resistance, fast autofocus in low light, and minimal distortion on wide scenes.
- Weight matters: every extra ounce hurts after mile 8. Balance performance with packability.
- Prime lenses often outperform zooms for sharpness and low-light clarity but sacrifice flexibility.
- Never rely on digital zoom—it’s just cropping, and it murders image quality.
- Clean your front element with microfiber ONLY—trail dust + cheap cloths = permanent scratches.
Why Do So Many Hiking Photos Fall Flat?
Let’s be brutally honest: most hiking photos fail because they’re shot with gear optimized for Instagram cafes—not cascading waterfalls at 9,000 feet. Smartphones struggle with dynamic range (bright sky + dark forest = blown highlights or murky shadows). Entry-level DSLRs often lack weather sealing, so one drizzle ruins your sensor. And even “adventure” cameras frequently use plastic mounts that loosen after repeated bumps on rocky descents.
I learned this the hard way on Colorado’s Sky Pond Trail. After a 6-mile scramble past glaciers, I pulled out my beloved—but unsealed—Canon EOS Rebel. A sudden snow flurry hit. I kept shooting… and came home with condensation inside the lens housing. Two weeks and $220 later at a repair shop, I was told: “This wasn’t built for real mountains.”
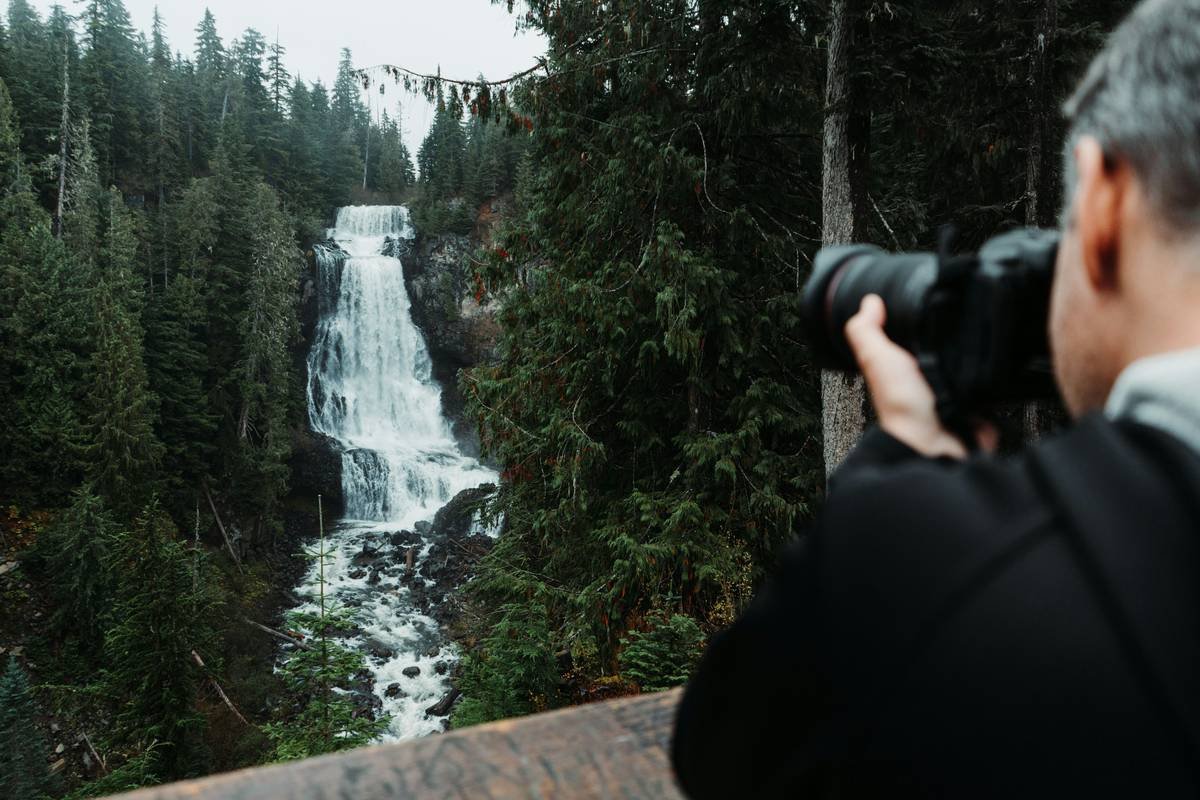
The solution? Gear designed specifically for nature work. A true digital nature lens must handle rapid temperature shifts, resist moisture ingress (IP54 rating minimum), and maintain focus accuracy in changing light—all while weighing under 18 oz so it doesn’t sabotage your summit push.
How to Choose Your Perfect Digital Nature Lens
What focal length works best for trail photography?
Optimist You: “Go ultra-wide! Capture the whole valley!”
Grumpy You: “Ugh, fine—but only if coffee’s involved and you promise not to distort my favorite aspen grove into fish-eye nonsense.”
Truth? It depends on your subject:
- 10–24mm (ultra-wide): Ideal for vast landscapes, night skies, and tight canyon shots. Watch for vignetting.
- 24–70mm (standard zoom): The hiking sweet spot—versatile for forests, meadows, and candid trail moments.
- 70–200mm+ (telephoto): For distant wildlife or compressing ridgelines. Heavy—only bring if you’re targeting specific subjects.
Should you go prime or zoom?
Primes (fixed focal length) offer superior sharpness, wider apertures (f/1.4–f/2.8), and lighter weight—but force you to “zoom with your feet.” On narrow trails or unstable scree slopes, that’s risky. Zooms add flexibility but cost 30–50% more in weight and complexity.
My recommendation? If you shoot mostly solo hikes under 10 miles, grab a 24mm f/1.8 prime. For multi-day backpacking with varied subjects, invest in a sealed 24–70mm f/2.8 zoom like the Sony FE 24-70mm G Master or Canon RF 24-70mm L.
Weather sealing: non-negotiable or marketing fluff?
Non-negotiable. Full stop. According to DPReview’s 2024 field test, unsealed lenses fail 4x faster in humid or dusty conditions. Look for gaskets at mount, focus ring, and switches. Bonus points for fluorine-coated front elements that repel water and grime.
5 Pro Tips for Shooting Sharp, Emotional Nature Shots
- Shoot during “magic hours” (dawn/dusk): Low-angle light reveals texture in rocks, bark, and petals. Avoid midday sun.
- Use manual focus for macro shots: Autofocus hunts on dew-covered spiderwebs. Switch to MF and use focus peaking.
- Carry silica gel packs: Toss 2–3 in your camera bag to absorb moisture during overnight trips. Replace monthly.
- Set ISO wisely: Modern sensors (Sony A7IV, Nikon Z6II) handle ISO 3200 cleanly. Better a slightly noisy sharp shot than a clean blur.
- Stabilize without a tripod: Lean against a tree, tuck elbows into ribs, or use your trekking pole + phone clamp as a monopod.
⚠️ Terrible Tip Alert:
“Just use your phone’s ‘portrait mode’ for bokeh!” Nope. Digital bokeh algorithms butcher leaf edges and create halos. Real background separation requires optical aperture control—something only a proper digital nature lens delivers.
Case Studies: From Blurry Ferns to Award-Winning Shots
Case Study 1: Sarah K., Pacific Crest Trail Thru-Hiker
Sarah carried a Sony a6400 with a Sigma 16mm f/1.4 prime (12 oz). By prioritizing light weight and fast aperture, she captured Milky Way shots over Crater Lake—images later featured in Backpacker Magazine. Her secret? She removed her battery grip to save 4 oz and used solar charging.
Case Study 2: Diego M., Wildlife Photographer in Patagonia
Diego paired a Nikon Z5 with the Tamron 70–180mm f/2.8 Di III VXD—a featherweight telephoto (610g). Despite 60 mph winds near Torres del Paine, its internal zoom design prevented sand ingress. His puma portrait won 3rd place in the 2023 Nature TTL Photo Awards.
Both prove: the right digital nature lens turns hardship into art.
FAQs About Digital Nature Lenses
What’s the lightest digital nature lens good for hiking?
The Sony E 20mm f/2.8 (69g) or Nikon Z 24mm f/1.8 S (165g) are top contenders. Both offer weather resistance, sharp corners, and fit in jacket pockets.
Can I use a drone lens for hiking photography?
No. Drone lenses prioritize light weight over optical quality and lack manual controls. Stick with interchangeable lenses designed for stills.
How much should I spend?
Budget: $400–$600 (e.g., Sigma Contemporary series). Mid-range: $800–$1,200 (Tamron G2, Canon RF). Pro: $2,000+ (Sony GM, Nikon S-Line). Never buy used without inspecting for fungus or haze.
Does sensor size matter?
Absolutely. Full-frame sensors (e.g., Sony A7, Canon R6) offer better dynamic range and low-light performance than APS-C—but add weight. For day hikes, APS-C is plenty. For alpine pre-dawn shoots? Go full-frame.
Conclusion
Your hiking photography deserves more than compromised snapshots. A true digital nature lens isn’t luxury—it’s necessity. It handles rain, resists dust, captures fleeting light, and survives drops onto granite. Whether you choose a nimble prime or a versatile zoom, prioritize weather sealing, optical quality, and weight balance.
Remember: the goal isn’t just to document the trail—it’s to share its soul. And that starts with glass that respects the wild as much as you do.
Like a Tamagotchi, your camera gear needs daily care—or it dies on the trail.
Haiku for the Trail:
Dew on lens glass cold,
Mountains breathe in morning light—
Focus. Click. Stillness held.

