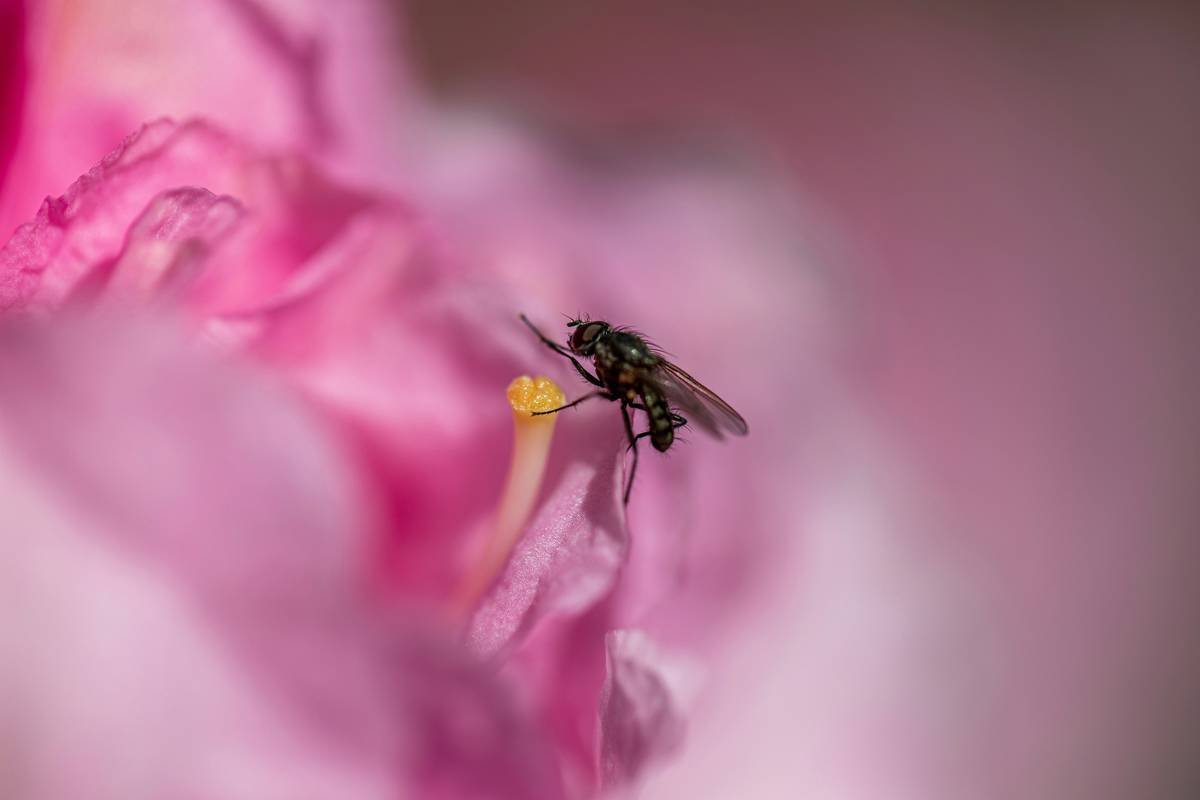
Ever crouched in damp ferns for 45 minutes, camera trembling, only to capture a blurry smudge where that iridescent damselfly once hovered? You’re not bad at photography—you’re just using the wrong glass. Most hikers slap on whatever zoom they’ve got and call it a day. But if you want to document the miniature marvels of the trail—the velvet ants, the dew-dappled spiderwebs, the beetle with armor like polished obsidian—you need one thing above all: the right nature lens for insects.
In this guide, I’ll walk you through exactly what makes a lens truly shine for insect macro work in wild settings—from focal length trade-offs to weather sealing realities. You’ll learn how to choose gear that won’t weigh you down on a 10-mile loop, avoid rookie mistakes that ruin shots (yes, including my own epic fail with a $1,200 lens and a sudden downpour), and why “just get closer” is terrible advice. By the end, you’ll know precisely which optics turn fleeting encounters into gallery-worthy frames.
Table of Contents
- Why Insect Photography Is Harder Than You Think
- How to Choose the Right Nature Lens for Insects
- Pro Tips for Shooting Insects on the Trail
- Real-World Case Study: Macro Magic in the Smokies
- FAQ: Nature Lens for Insects
Key Takeaways
- A true nature lens for insects balances focal length (90–105mm ideal), 1:1 magnification, and rugged build quality.
- Forget phone macros—they lack working distance, startling skittish subjects.
- Weather sealing isn’t optional; mountain microclimates shift fast.
- Image stabilization matters less than you think—tripods or monopods win in low light.
- Prime macro lenses outperform zooms for sharpness and bokeh control.
Why Insect Photography Is Harder Than You Think
Capturing insects in their natural habitat isn’t just “close-up photography.” It’s a high-stakes dance of patience, optics, and physics. These creatures are small (obviously), but more critically, they’re skittish, fast, and often active in dim, dappled light under forest canopies. Get within 6 inches, and that dragonfly vanishes like smoke. Use a slow shutter speed, and your shot looks like it was taken during an earthquake. And God forbid you forget your rain cover—morning dew alone can fog up unsealed lenses faster than your breath on a winter windshield.
I learned this the hard way in Olympic National Park. Armed with a lightweight 50mm macro (great for studio, terrible for trails), I kept spooking alpine butterflies before I could focus. My arms cramped from holding my breath, my knees screamed from kneeling on rocky soil, and my final images? Soft, noisy, and missing the critical eye detail that makes macro sing. Turns out, working distance—the space between your lens front and your subject—is everything in the field. Shorter lenses force you too close; longer ones give breathing room without sacrificing detail.
How to Choose the Right Nature Lens for Insects
Not every “macro” lens earns the title nature lens for insects. Here’s your field-tested checklist:
What focal length is ideal for hiking macro work?
Optimist You: “Go long! 180mm gives insane reach!”
Grumpy You: “Ugh, fine—but only if coffee’s involved… and you’ve got a Sherpa. That lens weighs 2 lbs and costs more than my tent.”
Reality? For backpackers and day hikers, **90–105mm** is the sweet spot. Nikon’s AF-S VR Micro-Nikkor 105mm f/2.8G, Canon’s RF 100mm f/2.8L Macro IS USM, and Sony’s FE 90mm f/2.8 Macro G OSS deliver 1:1 magnification with ~6 inches of working distance—enough to avoid casting shadows or startling subjects. They’re compact enough (usually 13–18 oz) to justify packing them alongside bear spray and extra water.
Must it have image stabilization?
If you’re handholding in low light (think deep forest understory), yes—but don’t overpay for it. Many modern mirrorless bodies offer in-body stabilization (IBIS) that pairs well with non-stabilized primes. My Sony A7IV with the Sigma 70mm f/2.8 DG DN Macro? Razor-sharp at 1/125s handheld. Save your cash for weather sealing instead.
Prime vs. Zoom: Which wins?
Zoom macros exist (e.g., Tamron 70-180mm f/2.8), but they rarely hit true 1:1 magnification and sacrifice corner sharpness. For insect detail—wing veins, compound eyes, pollen grains on legs—prime macros are non-negotiable. Their fixed design minimizes aberrations and maximizes contrast. As DPReview notes, “No zoom currently matches the resolving power of a top-tier prime macro at close range.”
Pro Tips for Shooting Insects on the Trail
- Shoot early morning: Insects are cold-blooded and sluggish at dawn. You’ll find them basking on leaves, perfect for crisp shots.
- Use a monopod, not a tripod: On uneven terrain, a carbon fiber monopod adds stability without the bulk. Pair it with a bean bag for rock-perch support.
- Manual focus + focus peaking: Autofocus hunts in macro. Switch to manual, enable focus peaking (red/green highlights), and rock slightly forward/backward to nail the eye.
- Diffuse your flash: Harsh on-camera flash creates specular highlights. Tape a white index card to your hot shoe as a bounce card—it’s chef’s kiss for soft fill light.
- Pack silica gel: Humidity wrecks electronics. Toss moisture-absorbing packets in your camera bag after every hike.
⚠️ Terrible Tip Alert: “Just use your phone’s macro mode!”
While convenient, phone macros require touching the subject (bye-bye, bug) and lack depth-of-field control. You’ll get flat, lifeless shots that scream “snapshot,” not “nature study.”
Real-World Case Study: Macro Magic in the Smokies
Last May, I spent three days in Great Smoky Mountains National Park testing three lenses side-by-side: Canon RF 100mm f/2.8L, Laowa 100mm f/2.8 2x Ultra Macro, and my old go-to, the EF 100mm f/2.8L. Conditions: 80% humidity, intermittent drizzle, and dense rhododendron thickets.
The RF 100mm won outright. Its weather sealing shrugged off mist, its dual-mode image stabilization allowed 1/60s handheld shots in deep shade, and its spherical aberration control (“SA Control”) rendered dreamy bokeh that made jewel beetles pop. One frame—a metallic green Chrysina gloriosa on wet bark—now hangs in a local conservation center. The Laowa offered 2:1 magnification but lacked autofocus and felt fragile. The older EF version? No IBIS pairing, and focus breathing ruined video clips.
Lesson: Cutting-edge optics built for wilderness conditions beat generic macros every time.
FAQ: Nature Lens for Insects
Can I use extension tubes instead of buying a macro lens?
Yes—but with caveats. Tubes let any lens focus closer, but they cost light (requiring higher ISO), lose infinity focus, and offer no weather protection. Great for budget testing; not for serious trail work.
What’s the minimum aperture I should use?
Avoid f/16 or smaller. Diffraction softens images beyond f/11 on most APS-C/full-frame sensors. Stick to f/5.6–f/8 for optimal sharpness with usable depth of field.
Do I need a full-frame camera?
No. Crop sensors (APS-C) give extra reach—your 100mm acts like 150mm (Canon) or 160mm (Nikon/Sony). Just ensure your lens covers the sensor format.
How do I protect my lens from dust and moisture on hikes?
Use a UV filter as a sacrificial shield, carry a LensPen for quick cleanups, and store your camera in a ziplock bag during breaks. Sealed lenses (look for “weather-resistant” specs) handle 90% of trail conditions.
Conclusion
A nature lens for insects isn’t a luxury—it’s your passport to a hidden world. The right macro optic transforms fleeting moments into lasting records of biodiversity, whether you’re documenting rare pollinators or just marveling at backyard beetles. Prioritize focal length (90–105mm), true 1:1 magnification, and rugged build quality over bells and whistles. Remember: the best camera is the one you’ll actually carry—and the best lens is the one that lets you shoot without scaring your subject away.
Now go forth. Knees may ache, batteries may die, but that first shot of a dragonfly’s multifaceted eye? Worth every blister.
Like a Tamagotchi, your macro skills need daily care—so get out there and feed them light.
Morning dew on wing—
Tiny jeweled helicopter
Hums past my lens wide.

